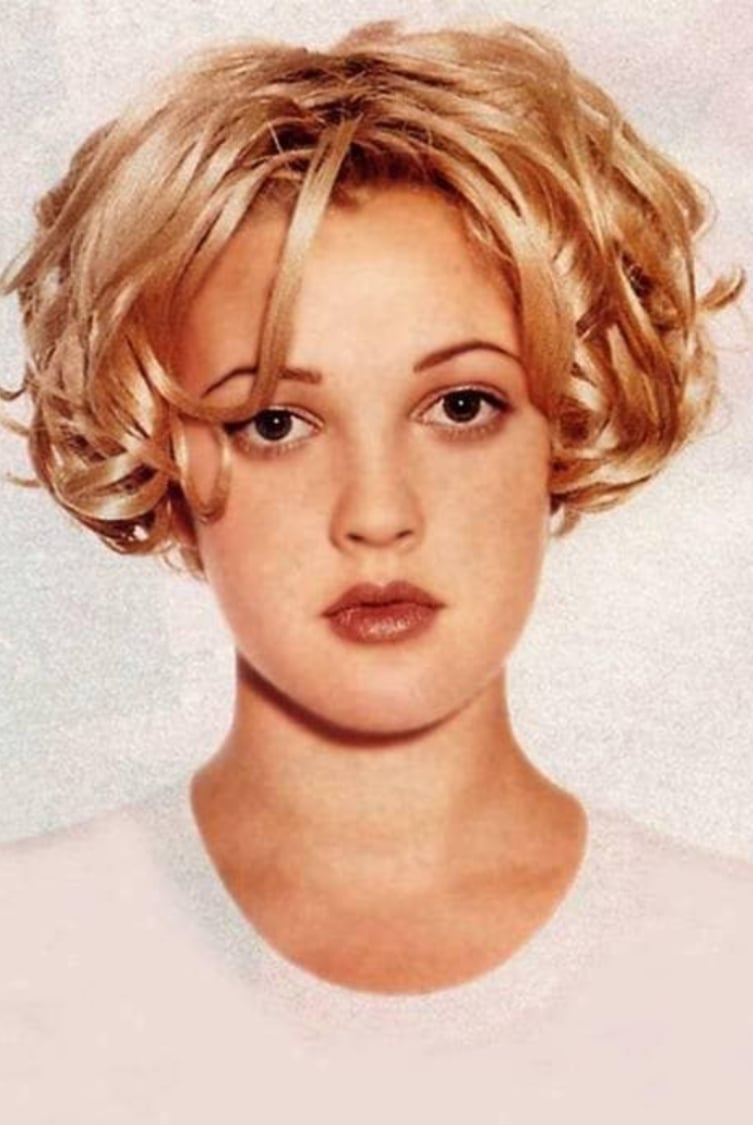
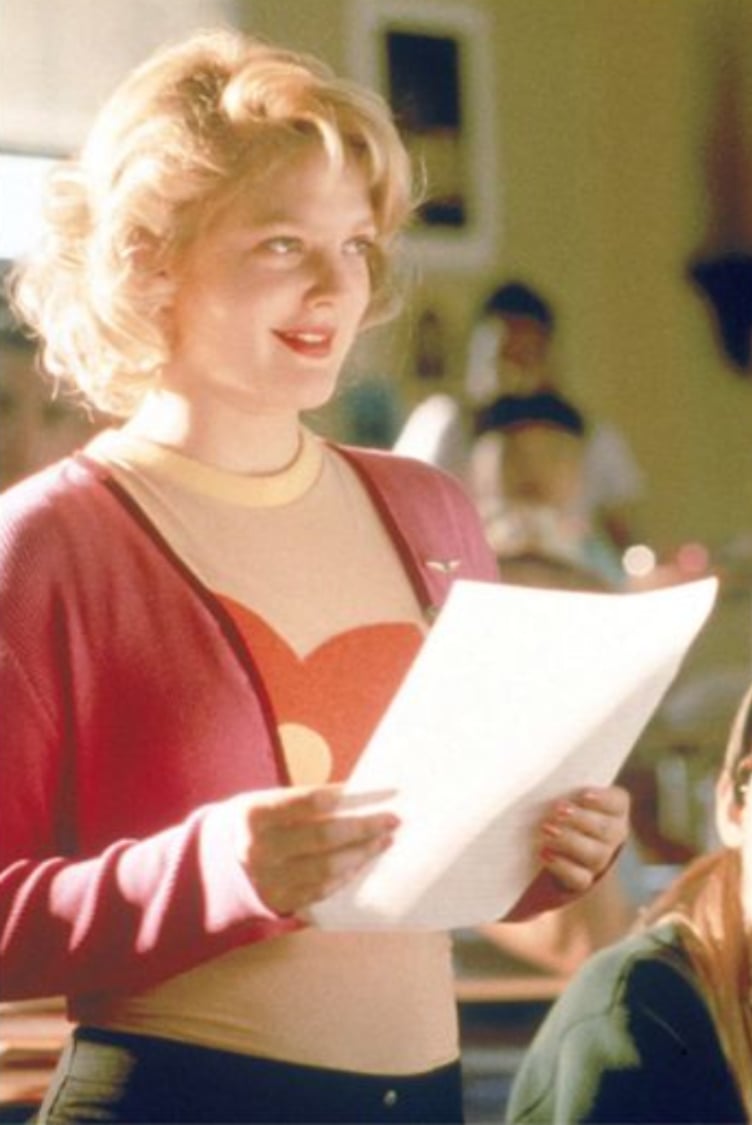
The classic movie makeover scenes in movies and television dramas are enduringly fascinating. With a few savvy hair, makeup and styling tips, one can seemingly transform from girl-next-door pretty to an elegant swan. Whilst changing your appearance to fit into other people's ideals should be steadfastly rejected, there are a few grooming techniques we can all gleam from these makeovers to level up and look a little more polished. Although the transformations look extreme, they're often the result of simple changes that can be replicated at home, without the need for a glam squad. Beauticate writer, Kristina, examined these makeovers closely and pin-pointed the key glow-up secrets behind some of the most iconic entertainment makeovers. However, alongside the physical transformations, there is often a powerful internal metamorphosis — where the character rises like an eagle from the ashes, with the importance of self-love, determination and perseverance reverberating throughout their inspiring journeys.
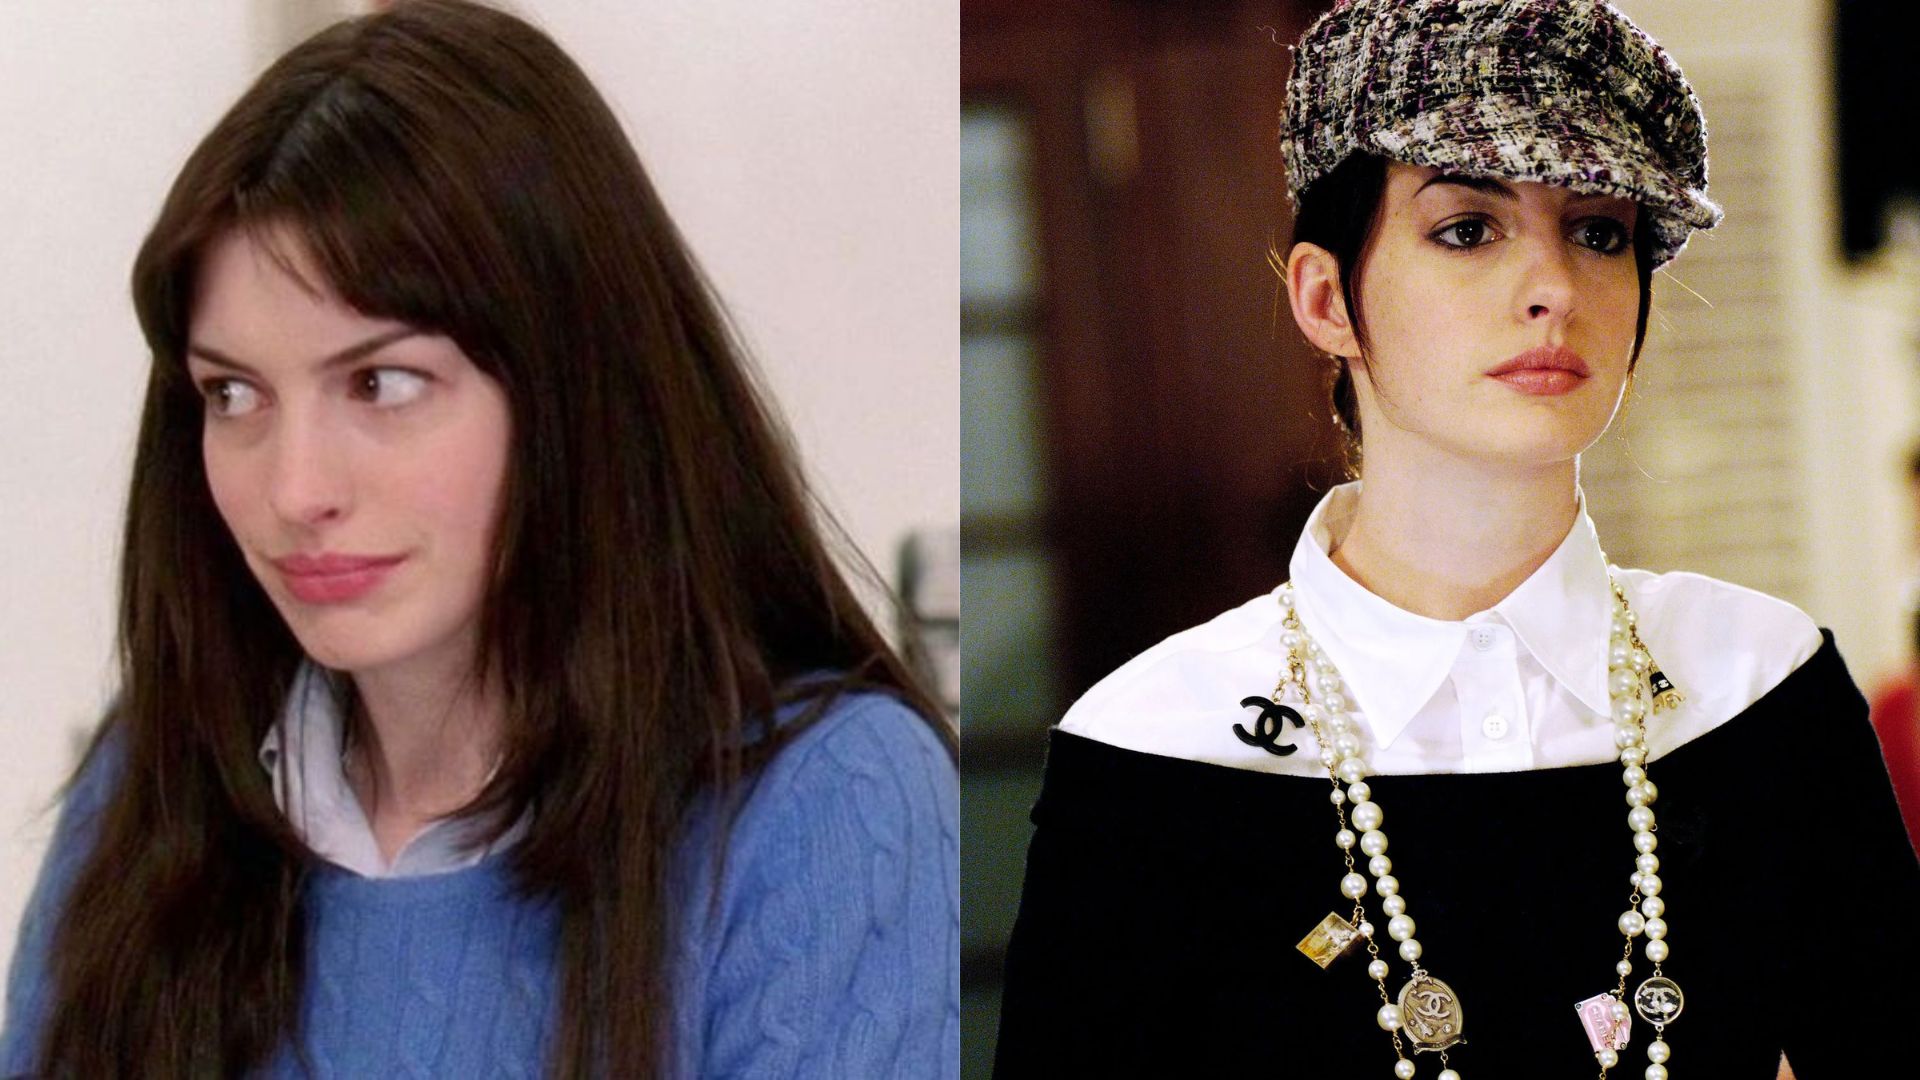
The Devil Wears Prada: Andy Sachs
In the Devil Wears Prada, Andy Sachs enters the fashion magazine world as a brainy assistant, who sees herself as too intellectual to be concerned with style. But, she soon discovers that survival in this competitive industry requires serving chic looks. After embracing the fashion-forward world of Runway, Andy’s once simple and mousy hair becomes sleek and voluminous. Her makeup follows suit, with a focus on her eyes—defined by sleek black eyeliner and smoky eyeshadow that produce an alluring gaze. Andy’s polished makeover reflects her immersion into the high-stakes fashion world, but it also becomes a mirror for the compromises she makes along the way. She ultimately realises that her true strength lies in embracing her individuality, proving she can succeed without sacrificing her identity.
The Makeup Tips that Made the Biggest Difference for Andy Sachs’ Makeover
- Mix a matte taupe and shimmery peachy-nude shadow together and apply all over your lids, focusing on building the colour at the crease for depth. Add a hint of soft plum at the outer corners for dimension.
- Blend a dark brown shadow into the crease, emphasising the outer third for a slight lift. To soften the edges, use a clean brush to diffuse the colour upwards toward the brow bone. Use a lighter brown shadow to define the lower lash line, and use a small fluffy blending brush to diffuse the line for a more subtle look.
- Tightline the upper waterline with black gel eyeliner. Then, apply the liner on the upper lash line and smudge it slightly for a soft, smoky edge. Add a touch of dark brown eyeshadow on top of the liner for a dreamy aesthetic.
- Tap a shimmery champagne shadow on the inner corners of the eyes and lightly along the brow bone to create subtle radiance. For a dewy finish, apply a liquid highlighter with a damp brush to the inner corners and middle of the eyelids.
- Layer both lengthening and volumising mascaras for full, fluttery lashes. Focus more mascara on the outer lashes to elongate and lift the eyes for a wide-eyed effect without falsies.
- Use a lip liner in a matching red shade to not only outline but also fill in the lips, creating a base that enhances the lipstick’s vibrancy. For added dimension, dab a slightly lighter red in the centre of the lips and press your lips together gently. Set the look by placing a tissue over your lips and dusting a fine layer of translucent powder through the tissue for a matte, budge-proof finish.
How to Achieve Andy Sachs’ Hair
To achieve Andy’s glossy and voluminous locks, opt for a hot air brush. Hot air brushes are a hybrid between straighteners and hair dryers — it gives the hair a fluffier and more voluminous finish than straighteners alone, but still maintains the sleekness of blow dries. After trialling several hot air brushes for this article, I highly recommend the BaBylissPRO Nano Titanium Hot Air Brush — it delivers stunning volume, without compromising on the integrity of my hair. The ionic technology produces a smooth and sleek finish with zero frizz, whilst the nylon pin bristles also untangle the most unruly knots.
- Start by applying a volumising mousse to slightly damp hair.
- Section your hair into 1-2 inch parts for better control.
- Lift a section of your hair upwards in a diagonal angle. Then, starting near the roots, place the hot air brush underneath the lifted hair (e.g. innermost layer) and brush your hair to the end, whilst holding your hair in the diagonal position.
- For a slight curl at the end, wrap the ends of your hair around the brush (in an inward direction) and hold it for 10 seconds, then release it.
- After styling each section, clip the ends to your roots until they cool to set the shape.
- Turn your head upside down. Then use the cool setting on the hot air brush and glide the brush throughout the inner layer of your hair (e.g. the hair directly facing you). This method results in shiny locks with added volume.
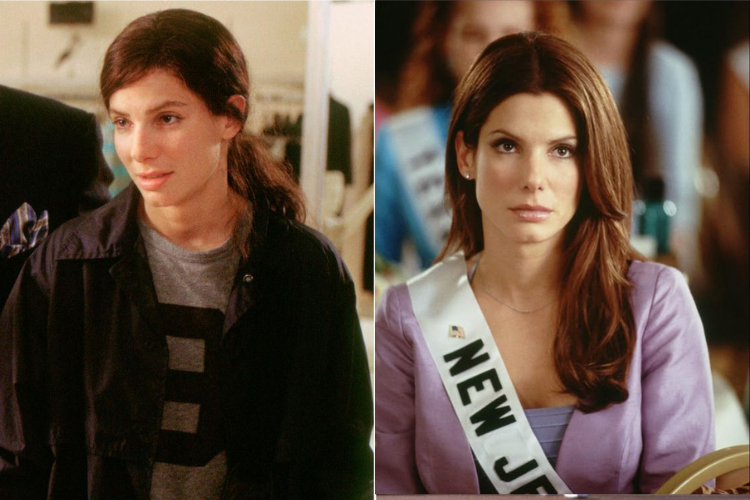
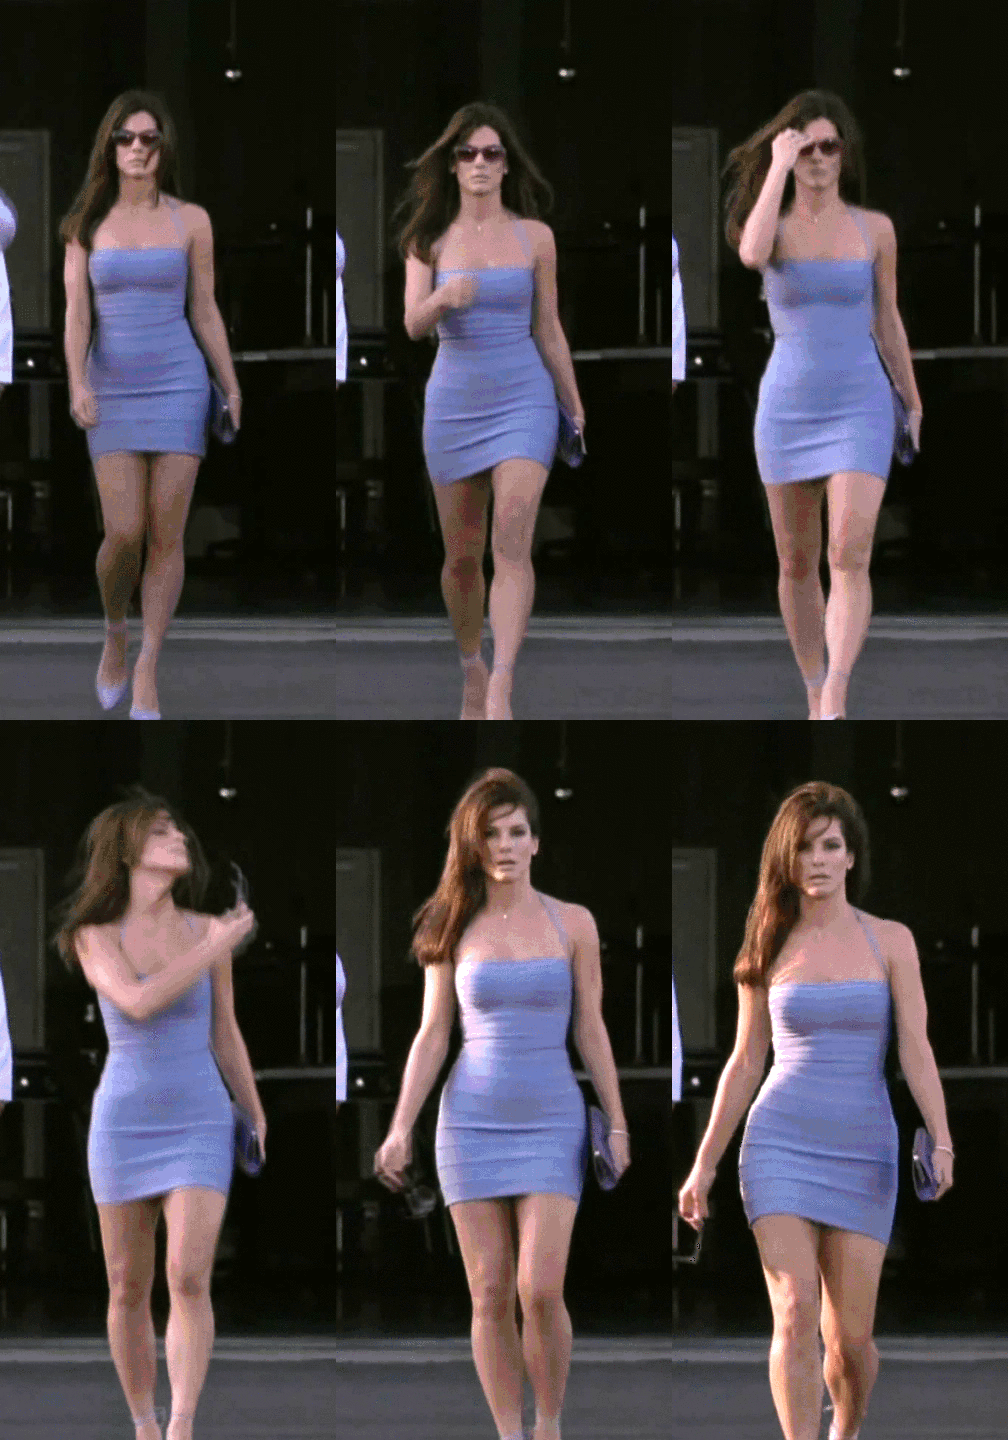
Miss Congeniality: Gracie Hunt
In Miss Congeniality, FBI agent Gracie Hart undergoes a transformation with her appearance and personality. Initially disheveled and indifferent to her looks, she’s given a glamorous makeover, complete with bouncy pageant hair, glossy makeup, and more posh attire. As she learns to carry herself with poise and grace, mastering the art of walking in heels and projecting confidence, Gracie also undergoes an internal change. Initially cynical about the pageant world, she grows to embrace her femininity, realising that strength and beauty aren’t mutually exclusive. Through this transformation, Gracie becomes more self-assured, balancing her tough exterior with vulnerability, ultimately embracing a more complete version of herself.
The makeup tips that made the biggest difference to Gracie Hunt’s makeover
- Choose a soft peach cream blush and apply it with your fingers, pressing it into the skin for a natural flush. Focus on the apples of your cheeks and blend it slightly upwards. Pro Tip: Mix a tiny amount of highlighter with the blush for a subtle glow.
- Apply a light beige or cream shadow as a base all over the eyelid. Next, take a warm brown shade and blend it into the crease with a fluffy brush, ensuring there are no harsh lines. Then, apply a cooler brown-taupe shade slightly above the crease. Pro Tip: Use a clean brush to diffuse the edges, creating a seamless transition between shades for a professional look.
- Use a fine-tip liquid eyeliner to create a smooth line along your upper lash line. Start from the inner corner and gradually build the line thicker towards the outer corner. For a subtle lift, extend the liner slightly past the outer corner, angling it upwards. Pro Tip: Use a small piece of tape as a guide for a clean wing.
- Curl your lashes first, then apply volumising mascara. Focus on the roots, wiggling the brush to add fullness. Apply a second coat while the first is still wet to avoid clumping.
- Apply a peachy nude satin lipstick directly from the bullet for a fresh, youthful appearance. To ensure longevity, apply a lip liner in a similar shade first, which also helps prevent feathering. Pro Tip: Blot with a tissue and reapply for a richer colour payoff.
- Use a light-coverage matte foundation for an airbrushed but natural effect. Finish your makeup with a hydrating setting spray. Hold the spray about six inches from your face and mist lightly in an “X” and “T” pattern for even coverage. Pro Tip: For added longevity, apply the setting spray before your foundation as a primer, then again at the end.
How to Achieve Gracie Hunt’s Hair
Gracie’s mousy brown hair was previously frizzy and unruly, but the hairstylists transformed her locks into the definition of vavavoom sultry: slightly tousled bedhair — voluminous, full of bounce, but still soft and smooth. Think: Victorias Secret, meets rock and roll royalty.
- After towel-drying your hair, mist a lightweight salt spray through the mid-lengths and ends. Salt spray adds that beachy, slightly undone texture while enhancing volume without creating curls. Focus on scrunching the product into your hair while damp, but avoid the roots to keep the hair from looking too gritty or weighed down.
- Blow-dry your hair upside down, but with a twist. Use a diffuser attachment instead of a standard nozzle. The diffuser will spread the heat more gently, creating natural lift and separation at the roots, adding that tousled texture. Run your fingers through your hair as you dry to encourage natural, airy volume.
- Mist salt spray again on the dry hair and then run a flat iron through large sections. When you reach the mid-length, give the flat iron a soft, quick turn away from your face. The salt spray provides added grip to the hair, making the subtle bends more defined yet still loose and tousled. Product recommendation: I always opt for the Silver Bullet Titanium 230 Supernova Touch Screen Hair Straightener for this step, because the titanium plates are gentle on the hair, and deliver fast silky straight locks, whilst giving the hair a healthy airy volume. Most straighteners can fry the hair, when paired with a salt spray, but this maintains the moisture of my locks!
- Use a micro-crimper at the roots, hidden under the top layer of hair. Crimping at the roots adds unseen texture and volume, giving that airy, tousled look without affecting the outer smoothness of the hair.
- After blow-drying, twist random large sections of your hair loosely and blast them with cool air from your dryer. You can alternate between twisting towards and away from your face to keep the look organic and not overly styled.
- Instead of relying on traditional hairspray, sprinkle a small amount of dry texture powder (like those used for root volume) onto your fingers and gently rub it into the roots. This gives added grip and volume, making the hair appear more naturally tousled. Unlike spray products, powders can offer a more long-lasting lift without any stiffness.
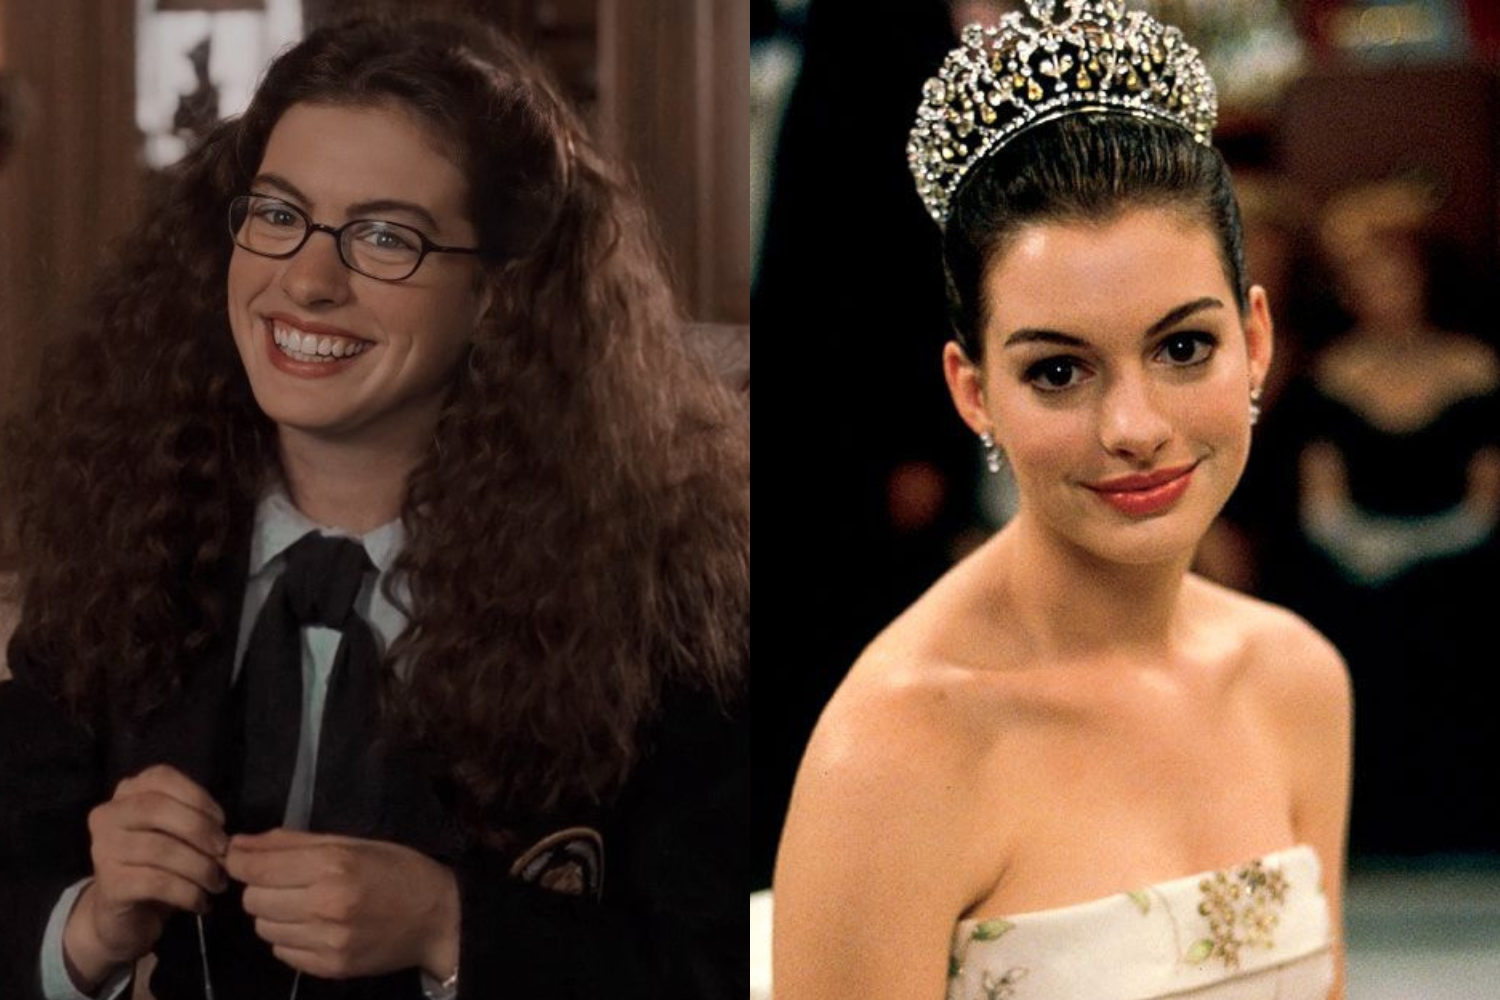
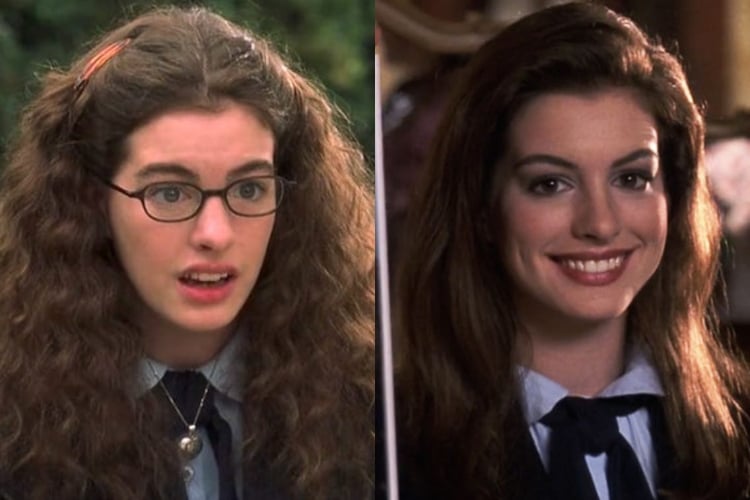
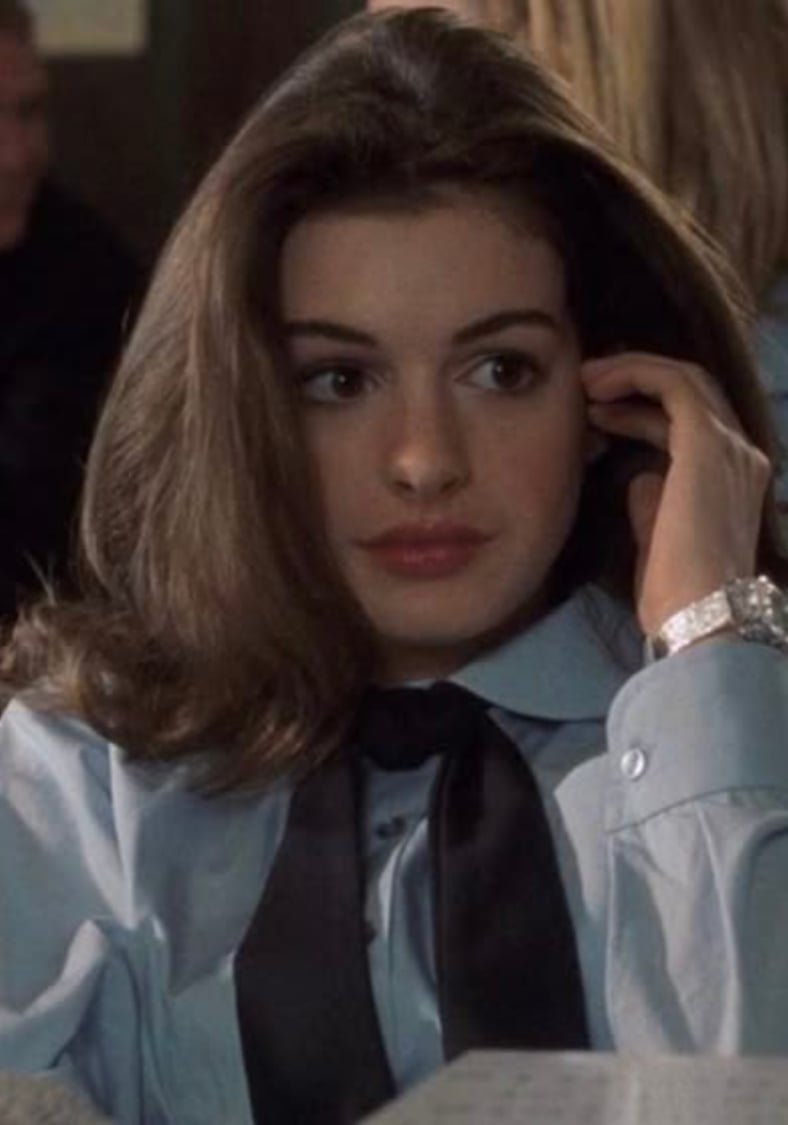
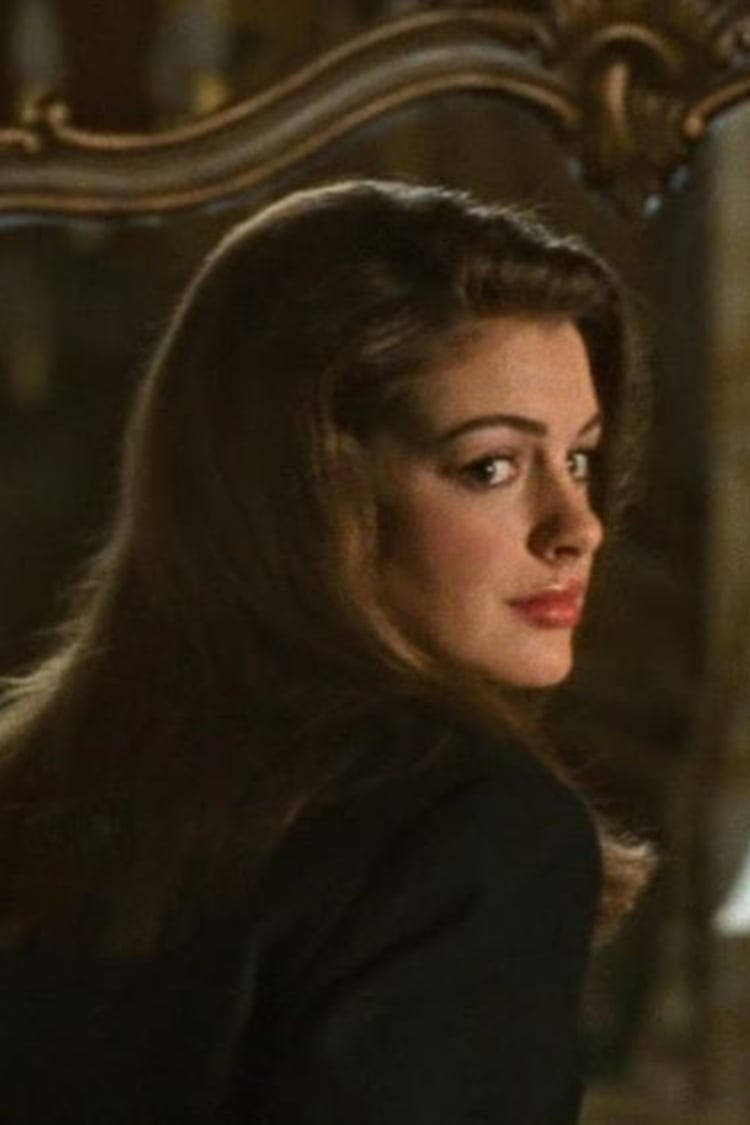
The Princess Diaries: Mia Thermopolis
At the start of the film, Mia is portrayed as a shy, slightly awkward and unconfident high school student. Her hair is beautiful but unruly, her eyebrows unkempt, and she is more interested in comfort than being stylish. This “before” look emphasises her desire to blend in and avoid attention. However, Mia soon discovers she is actually a princess and undergoes a sophisticated royal transformation that involves taming her unruly hair; reshaping her eyebrows; and applying softly glamorous makeup. Initially Mia dismisses royal life as superficial, however, she realises that being a princess is not just about appearance but about kindness, inner strength and a commitment to bettering the lives of people in her kingdom.
The Makeup Tips that Made the Biggest Difference in Mia Thermopolis’ Makeover
- To achieve Mia’s fresh, soft look, apply a light peach-toned eyeshadow all over the eyelid, from lash line to the crease. Peach is more youthful than traditional beige, giving a warm glow to your skin. Blend well for a smooth finish.
- Lightly dab a pale pink or champagne shimmer shadow onto the center of the lids. This adds a delicate touch of sparkle that catches the light but remains soft and approachable, much like Mia’s naturally glowing eyes. Special Tip: Use your fingertip to gently press the shimmer in for a more natural, diffused glow.
- To create gentle definition, apply a matte eyeshadow on the crease. Then blend a taupe-grey eyeshadow on top, focusing on the outer thirds of the eye and blending outwards/upwards for a subtle lift without harsh lines.
- Mia’s eye makeup often involves softer lines. Take a brown pencil eyeliner and line the upper and lower lash line, focusing on the outer two-thirds. Smudge it slightly with a cotton swab or small fluffy blending brush to create a more diffused, natural look.
- For her lashes, Mia’s look is glamorous but subtle. Apply 3 coats of a black mascara from the roots to the tips of the lashes using a zig zag motion. Then apply a light layer only to the tips of your lashes.
- Mia’s brows are naturally full, so the key is to tame them without over-defining. Brush through your brows with a clear brow gel or brow wax to keep them neat but still natural. Avoid creating sharp angles—keep the brow shape soft and youthful.
How to Achieve Mia Thermpolis’ Hair
To replicate Mia’s voluminous and sleek locks with subtle waves, there are special blowdrying techniques you can try at home, that can produce salon worthy results. My tried-and-trusted holy grail tool for this routine is the BaByliss Pro Nano Titanium dryer because the powerful motor shortens drying time and the nozzle ensures precise and controlled airflow for sleek locks. My favourite part is the versatility: there is a button you can press to infuse ionic technology in your blow dry — for a dramatic reduction in frizz (read: silky, soft locks), or you can also opt out of utilising the ionic feature for more volume (perfect at replicating a root perm).
- Instead of the typical spray, try a heat protectant cream. Cream formulas coat the hair more evenly and help create a smoother texture, which is key for achieving Mia’s sleek finish. Focus it on the mid-lengths and ends for extra protection and smoothness.
- Begin by using a diffuser attachment for the first few minutes of drying. This prevents your hair from becoming too puffy before you begin styling. Use it on low heat to start drying your roots, then switch to the nozzle attachment later for targeted airflow
- While you blow-dry the rest of your hair, wrap a silk scarf or hair wrap around your roots. This helps prevent flyaways/babyhair while you focus on drying the ends and mid-lengths. Once your ends are nearly dry, take off the wrap and continue drying the roots with a brush.
- Use a vented ceramic round brush while blow-drying, ensuring smooth heat distribution. The ceramic retains heat longer than regular brushes, so it helps “seal” the cuticle for a shinier finish. Use the brush to pull the hair taut as you direct the dryer downwards, smoothing each section from roots to ends.
- Wrap the ends of your hair around the brush in an inward curling motion, and blast the hair dryer in the direction the curl is facing. This method is great for replicating Mia’s smooth, tucked-in look without needing a curling iron. For a bouncy finish, release the twist slowly as you move the brush away from your hair.
- After drying each section, use the cool air setting on your blow dryer to “lock in” the style. Hold the cool air over each section for about 10-15 seconds. This helps the hair retain its smooth, sleek shape and reduces frizz.
- Midway through your blow-dry, lightly mist your hair with a leave-in conditioning spray. This adds moisture without weighing the hair down and keeps it soft while you finish drying.
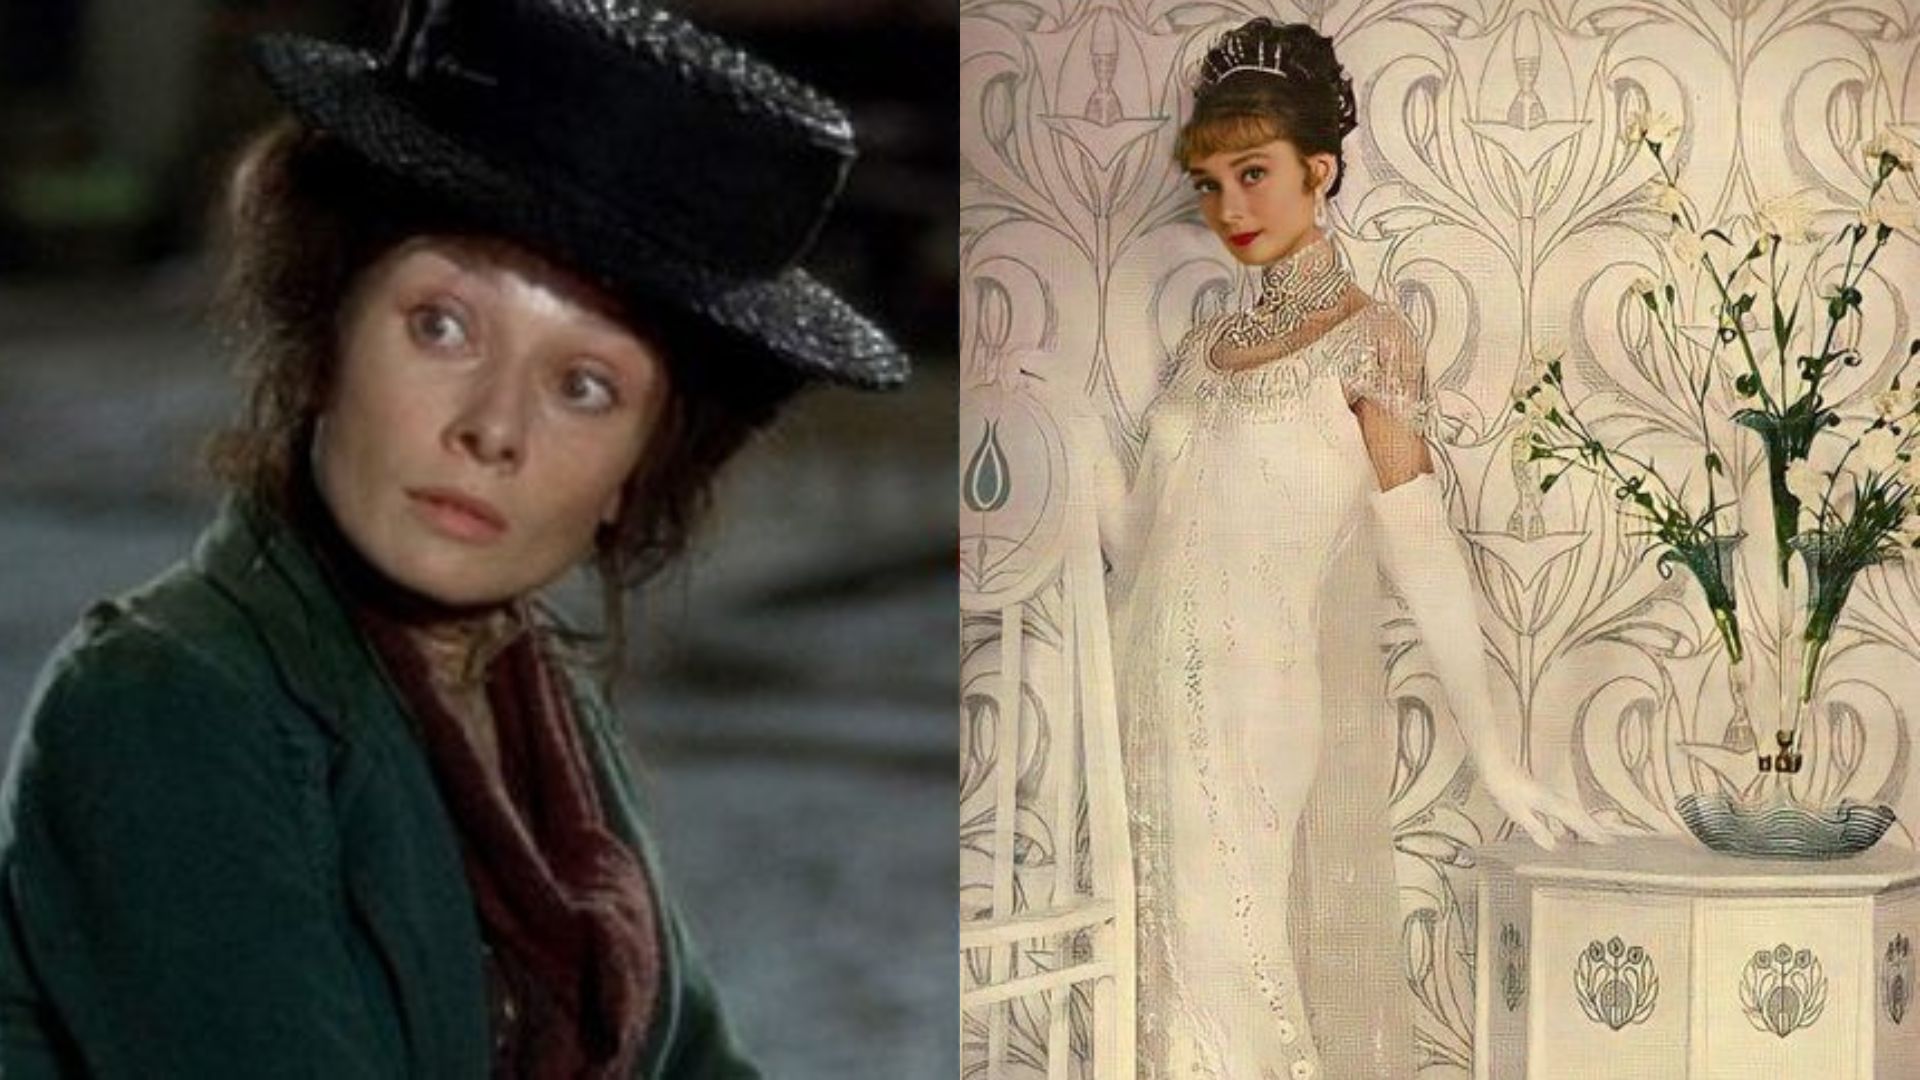
Eliza Doolittle: My Fair Lady Hair & Makeup
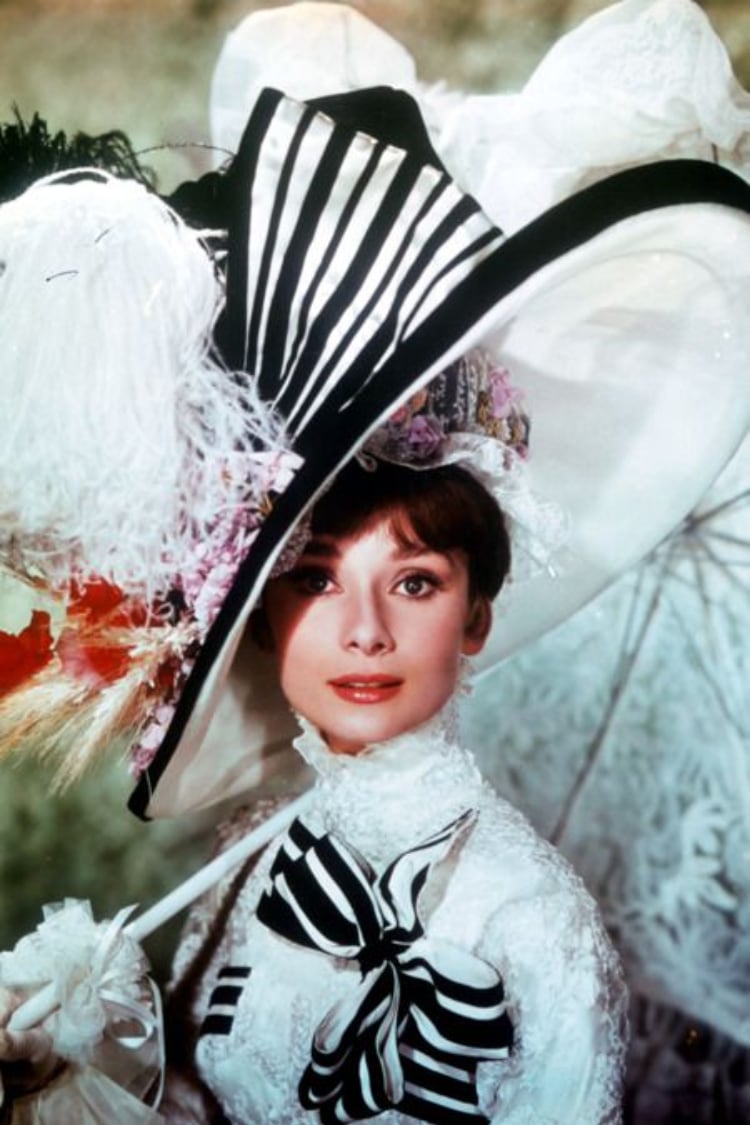
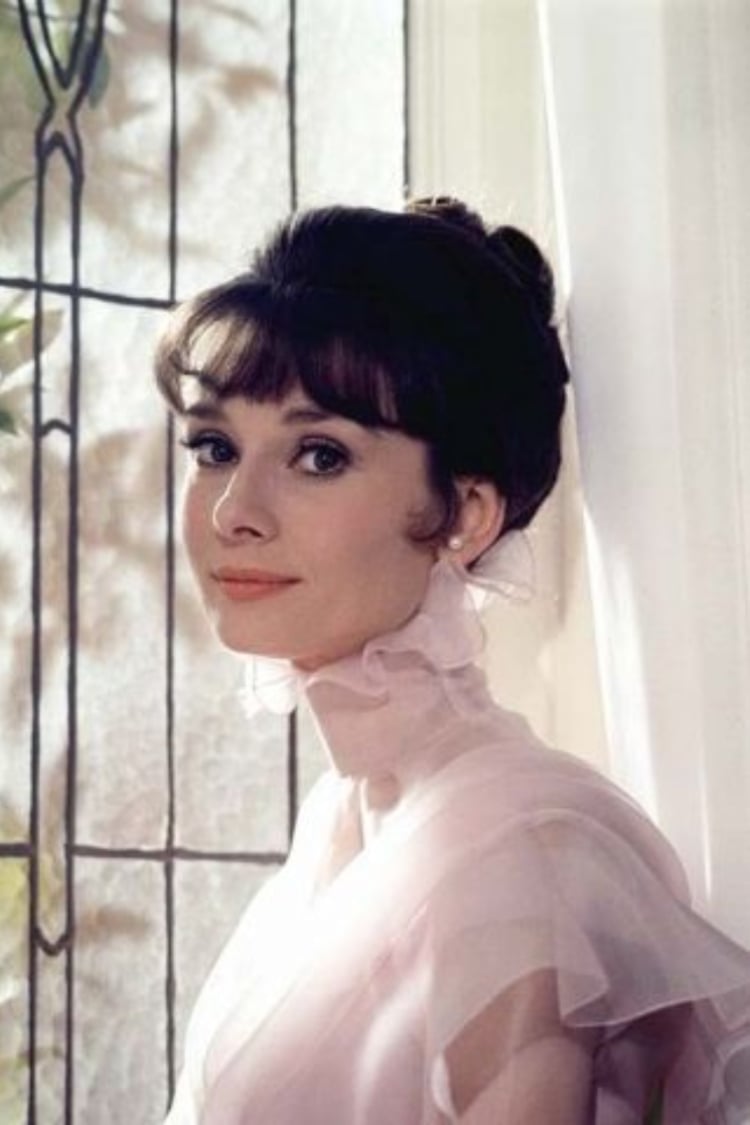
In My Fair Lady, Eliza Doolittle, played by Audrey Hepburn, undergoes a drastic transformation from a rough-around-the-edges flower girl to a refined lady. Initially characterized by her strong Cockney accent, unkempt hair, and rural clothing, Eliza’s journey begins when Professor Henry Higgins teaches her to speak and behave like a member of high society. Her makeover includes elegant hairstyles, stylish dresses, and polished makeup, with the iconic Ascot scene showcasing her transformation into a glamorous figure. Ultimately, Eliza discovers that no matter how fancy her exterior is, she will never truly shine or feel confident unless she infuses her own distinct touches into her look and embraces her background, as opposed to concealing it in shame.
The Makeup Tips that had Made the Biggest Difference for Eliza Doolittle’s Makeover
- Instead of defining your brows with a pencil, use a brow powder that matches your hair color. This technique creates a more natural look. Apply it with an angled brush for precise control.
- For the eyes, apply a champagne-coloured cream eyeshadow all over the lid. This adds subtle dimension without overpowering the natural beauty of the eyes. For a touch of definition, use a soft, taupe eyeshadow in the crease, blended out gently to enhance the shape of the eyes.
- Instead of a traditional eyeliner, use a dark brown eyeshadow applied with an angled brush along the upper lash line. This softer approach enhances the lashes without the harshness of liquid liner, creating a classic and elegant line.
- Apply a coat of fibre mascara that builds both volume and length, giving a delicate yet noticeable lift to your lashes. Focus on the outer lashes for a subtle cat-eye effect that complements Hepburn’s signature look.
- For the cheeks, use a cream blush in a soft pink or peach. Applying it with your fingers, focus on the apples of your cheeks and blend it back toward your temples. This technique mimics the natural flush of youth and freshness.
- Choose a peachy-pink lip stain. Pat it in with your finger for a just-bitten look.
How to Achieve Eliza Doolittle’s Hair
Eliza Doolittle’s hair transformation in My Fair Lady progresses from untamed and disheveled to sleek and polished, with graceful updos and soft waves that highlight her growing sophistication and poise
- Start with dry hair and apply a heat protectant spray evenly. This is crucial for minimising damage and ensuring smooth styling.
- Divide your hair into four horizontal sections using hair clips. Begin with the bottom layer, which provides better control and allows you to focus on each section without overwhelming yourself.
- For each 1-inch section, clamp the curling iron near the roots, keeping the barrel facing down. Wrap the hair around the barrel, leaving the last inch straight to create soft waves. Hold for 10-12 seconds to set the curl, then gently release it to cool. This technique creates soft, vintage waves instead of tight curls.
- Once all sections are curled, let them cool completely for maximum hold. After cooling, gently separate the curls with your fingers, creating soft waves that will form the foundation of the updo.
- Create a low ponytail at the nape, ensuring it’s smooth yet relaxed. Use a fine-tooth comb to gently smooth any bumps, allowing for a polished appearance without excessive tension.
- Twist the ponytail and wrap it around the base to form a bun, securing it with bobby pins as you go. Ensure the bun feels secure but not too tight; this allows for a more natural look. Consider pinning a few loose strands for added texture.
- Take the front strands you left out and lightly curl them with the curling iron using the same method as before. Pin them back into the bun or let them softly frame your face for an elegant touch.
- Finish with a light mist of medium-hold hairspray to keep the hairstyle in place while allowing movement. This step ensures your look remains fresh throughout the day.
Josie Geller: Never Been Kissed
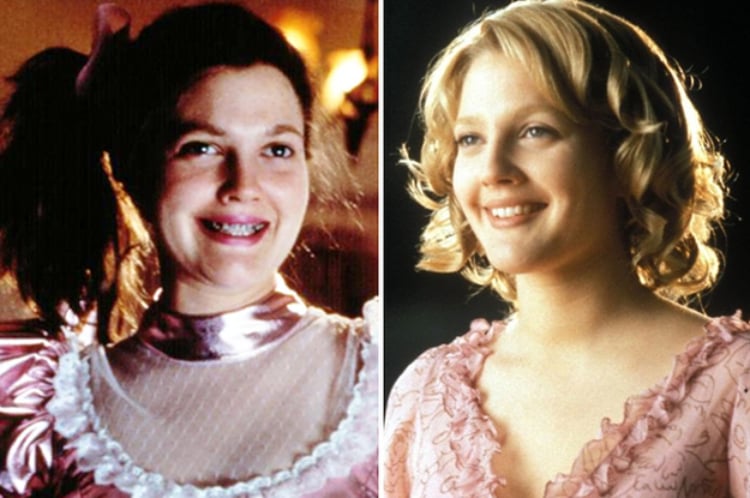
In Never Been Kissed, Josie Geller, a journalist, goes undercover as a high school student to investigate the latest trends in teen culture. Initially portrayed as a geeky tomboy, she undergoes a transformation and embraces cooler more fitted outfits, which give her a youthful, refreshed look. Her hairstyle becomes sleeker, with soft waves that add elegance, while her makeup looks more rockstar-esque. In high school, Josie was ridiculed because of her awkwardness and lack of style. The makeover is symbolic of Josie shedding pass insecurities and embracing a newfound sense of confidence and pizzaz in her real life. However, she learns that while appearances can change how others perceive us, it’s our mentality, actions and how we handle new opportunities that define us.
The Makeup Tips that made the Biggest Difference to Josie’s Makeover
- Lightly fill in your brows with a pencil or powder, keeping the look soft and natural. Josie’s brows are defined but not overly sculpted—think more approachable.
- Use a subtle coppery-bronze eyeshadow as a base, and apply a shimmery soft pink or lavender hue on the middle of he lids.
- Apply a dark brown eyeliner just at the roots of the upper lashes to create definition without a stark line. Use a softer brown eyeshadow to very lightly line beneath the lower lashes, blending it out with a fluffy brush for a soft look.
- For Josie’s signature lip, choose a matte lipstick in a rich berry or mauve shade that captures the essence of the late ’90s. Start by lining your lips with a matching lip liner, slightly overlining the center of your lips for fullness. Fill in with the lipstick, applying with a brush for precision.
- Apply a cream highlighter to the high points of your face—cheekbones, brow bones, and the bridge of your nose. Josie’s look is fresh and vibrant, so keep the glow light and natural.
How to Achieve Josie Geller’s Hair
Josie Geller’s 90’s cool-girl locks may look difficult to style, but I discovered a simple curling routine that can easily capture the essence of her hair playful hair. Remember: whilst technique is important, but the type of curling iron you use can determine how beautiful and long-lasting the curls are. A tried-and-trusted curler that never fails is the Silver Bullet Fastlane. The titanium barrel preserves the hair’s integrity — leaving the hair looking ultra shiny, and the tools produces curls that are bouncy and long-lasting. The customisable heat settings allows you to tailor the temperature to your hair needs (e.g. those with fine hair may opt for a lower setting, whilst those with thicker hair may require higher temperatures).
- When blow-drying, attach a diffuser to your dryer and use a low heat setting. Flip your head upside down to create natural volume and texture. Scrunch While Drying: As you dry, scrunch your hair with your hands to enhance waves and create a carefree texture.
- Utilise a 1-inch Curling Wand: For Josie’s loose, bouncy curls, opt for a 1-inch curling wand instead of a traditional iron. This will create a more relaxed, soft curl. Wrap Away from the Face: Take 1-inch sections and wrap them around the wand away from your face, holding for 8–10 seconds. Ensure the ends are left out for a more modern, undone look.
- Use a Crimping Iron on the Roots: For added lift, lightly crimp the roots of your hair with a crimping iron (just a quick touch). This technique adds volume without compromising the curls.
- Backcomb Strategically: Lightly backcomb the crown sections using a fine-tooth comb. Focus on the roots and smooth the top layer for a polished appearance.
Related Posts

Magnesium pools by Blue Haven Pools. Cold plunges. Rain showers that reset your nervous system. Water is wellness—and your home...

Genius makeup tools were designed with disability, dignity, and damn good design in mind.
My skincare secret to a seriously glowy and plump complexion.
Why TikTok, top derms, and your gym bag are obsessed with Hypochlorous Acid ...
